Beaded Crotat
There are two ways of adding beads to crotat. The first way is the same as adding beads to crochet.
The second way is to add them as you work. Both ways are used in the same pattern.
I have used DMC Perle size 5 and size 8 silver lined glass beads, along with a 1.50mm crotat hook and a 0.65 mm additional hook for this tutorial
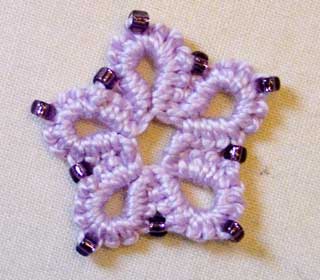
We are going to make a beaded flower to learn how.
Here is the pattern.
Beaded Flower
12 beads required. Thread on 6 beads.
Ring 1: 3 ds, p, 3 ds, bp, 3 ds, p, 3 ds, close ring.
Rings 2-4: 3 ds, bjp, 3 ds, bp, 3 ds, p, 3 ds, close ring.
Ring 5: 3 ds, bjp to ring 4, 3 ds, bp, 3 ds, bjp to ring 1, 3 ds, close ring.
Fasten off, tie ends together and sew them in.

You will notice that the beaded picots have little bobbles in the middle of the lines.
Beaded Picot (bp)

For beaded picots, the beads are threaded on to the thread or yarn before starting.
Thread on the required number of beads.
1. work 3 ds, p, 3 ds as in the pattern.

2. Slide a bead up to the hook.

3. Work the remaining 3 ds, p, 3 ds and close the ring as in the pattern.
That is all there is to it.
Beaded Joining Picot (bjp)
This is a little more fiddly. You will require an additional hook which will fit through the beads.
You will notice, as you work this section, that not all of the beads will fit on the hook.
Just put these beads to one side and, when you make your next beaded project, use them to thread on before you start for the beaded picots.
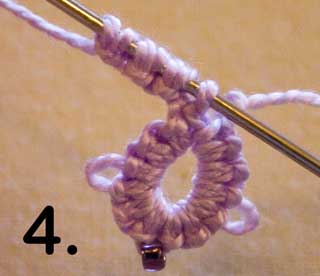
4. Work the 1st 3 ds for the 2nd ring as in the pattern.

5. Thread a bead on to the small hook.

6. Insert the small hook in the picot on ring 1.
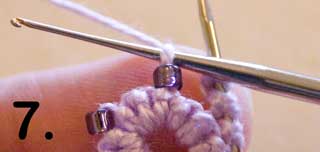
7. Pull the picot through the bead.
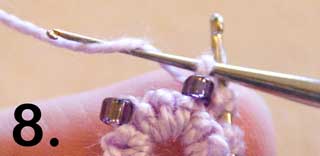
8. Yarn over hook . . . .

9. . . . . and pull through the picot.
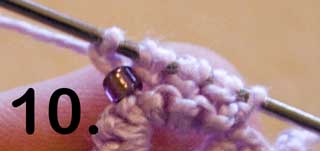
10. Slide the loop on to the crotat hook and tighten so that it is the same as the others. Complete the ring as in the pattern.
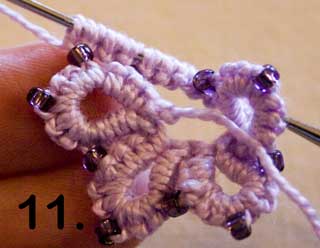
11. The second beaded joining picot on ring 5 is worked in the same way.

And here is your completed flower.
Of course, you don’t need to stop there with the beads.
You can add as many as you would like to any pattern, whether the instructions are beaded or not.
Now you know everything you will need to know to make any of the crotat patterns on my website.
Don’t be afraid to experiment and, please, share the results by posting on my
Facebook page.
 MENU
MENU